For the Love of Nature: Studying & Becoming Entomologists Activities
Activities
Step 1: Accessing Prior Knowledge: What is a Scientist?
- Post the word “scientist” where students can see it. Ask your students to write down what comes to mind when they see that word. Give them a few minutes to write in their notebooks.
- Once most students are finished writing, ask them to draw what they think their scientist looks like. With their drawing, they should include information like where they work, what they do, what types of equipment they need, what kind of education and training they might require, etc. Allow 10-20 minutes for them to complete this activity.
Circulate around the room and ask probing questions to help them make more complete descriptions of what their scientist looks like and what they do in their work.
Step 2: Guided Discussion & Critical Framing
After your students have completed these drawings, ask the following questions and as they share list descriptions on the board.
- What is a scientist? What do scientists do?
- What does your scientist look like? Do they look like you?
NOTE: As students begin describing scientists they may make many references to white men(1). Use this opportunity to find and share images of the following scientists who have made major contributions to the field and support your students in imagining more diverse and accurate representations of scientists. Provide descriptions of these individuals’ work that is age-appropriate for the learners in your care.- Shirley Ann Jackson - The second Black woman in the United States to earn a doctorate in physics, Jackson says her science education informed her work as chair of the U.S. Nuclear Regulatory Commision
- Margarat A Liu - researcher studying gene expression, immune responses, and vaccines.
- Celine Gounder - a member of the United States’ COVID-19 advisory board and a clinical assistant professor of medicine and infectious diseases at NYU Grossman School of Medicine.
- Dr. Marcella Nunez-Smith - an associate professor of medicine and epidemiology at Yale University and associate dean for Health Equity Research at Yale School of Medicine and on the United States’ COVID-19 advisory board.
- Dr. Eric Goosby - an infectious disease expert who held prominent health positions in the Clinton and Obama administrations & member of the United States’ COVID-19 Advisory Board
- Robin Wall Kimmerer - Environmental and Forest Biologist & Distinguished Teaching Professor and Director, Center for Native Peoples and the Environment
- What equipment are these scientists using? What other equipment would they need that isn’t in your drawing?
- Where do they work? (ex: In a lab? Outdoors? Both? Somewhere else?)
- Who do they work with?
(1) Views held by students of what scientists look like and how they engage in science are often narrow and exclusive, reflecting stereotypes of science and scientists that have existed for decades (Finson, 2010). Characteristics of the stereotypical scientist include being white, male, working independently in a lab, and usually with test tubes and a lab coat.
Step 3: Introducing Entomology
- Ask you students if they have heard of the term “biology”? (most have). Ask them to share what they think that means with an elbow partner. Draw them back together and share that it means “the study of living things or the study of life”. Write on the board:
- bio – life (from the Greek word bios) + ology – the study of = biology – the study of life or living things
- Ask them if they have heard of other similar words. Take a few answers. Give “zoology” as an example that comes from the new Latin zoologia meaning the "study of animals.” Contrast zoology from biology as the study of animals versus the study of living things, which also includes plants and microscopic organisms.
- Ask your students if they have heard the term “entomology.” Some may have heard the word or they might have wild guesses. Refrain from clarifying the term just yet. Have them practice saying the word aloud as a group or with a partner.
- Write “entomology” on the board and have them put it in their notebooks. You may want to have them look up the definition or you may provide it for them here:
- Entomology is the study of insects, including their relationships with other animals, their environment, and human beings
Entomologists study insects, such as flying insects, ants, bees, and beetles. They also study arthropods, a related group of species that includes spiders and scorpions. Most entomologists specialize in a particular type of insect.
- Entomology is the study of insects, including their relationships with other animals, their environment, and human beings
- With a partner, have students think of questions they might like to ask an entomologist
Step 4: Screen The Love Bugs & Take Viewing Notes
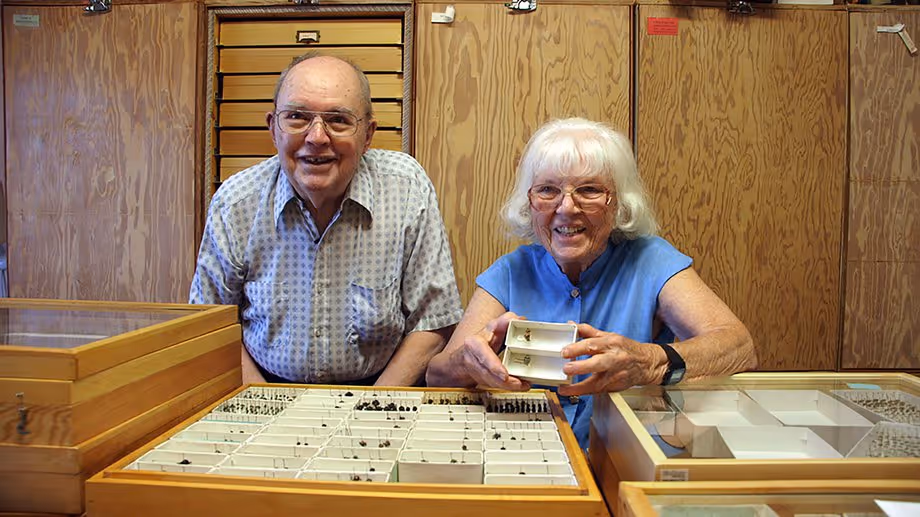
Tell students they will get to see a film called The Love Bugs and meet real entomologists who have been working together for 60 years! Ask students to share some of the questions that they would ask real entomologists. Give students a few minutes to add any notes to their questions after hearing the perspectives of others. As time permits, allow students to share some of their questions with the class.
As students watch the film, ask them to write notes responding to the following prompts and questions:
- Where did Lois and Charlie work?
- How did they keep track of the bugs they found?
- How did they know where to look for the bugs they were interested in studying?
- What did “studying” the bugs mean to Lois and Charlie?
- In what ways is their work important?
Screen the film (32 minutes)
Step 5: Discussion
Give students a little time to reflect on the notes they took during the film and to write any questions or thoughts they have remaining. Using the prompts provided, facilitate a discussion with your students to better understand what they learned and what questions are still lingering.
Step 6: Becoming Entomologists
NOTE: This activity should be done after you have prepared for it by using the beans and noodles and collection containers necessary. Carefully place the “insects” in your classroom or in the schoolyard in places where students can also take notes about the “environments” in which the “insects” live. You might also want to decorate the beans and noodles by adding “eyes” or “legs” etc. to each “insect” ahead of the group study and description.
- Explain that entomologists were bringing 5 new species of insects from Africa back to your city/town to study, but they have gotten loose in the schoolyard (or wherever your study area is located). The entomologists are asking your student scientists to help them recover these escaped insects. It is up to your student scientists to find the insects and safely bring them in the classroom where they can be returned to the entomologists. The entomologists say that the “insects” are safe to handle - they won't bite or sting, nor are they poisonous. Mention that it is acceptable to collect these insects because they don't belong here and could pose a problem to the native animals and plants. This provides the rationale for collecting insects instead of leaving them alone.
- Show an example of each “insect” to be collected, one at a time. Enhance the students' role-playing abilities by showing each “insect” carefully, as if it could escape from your hands! Ask the students to give short descriptions of the “insect”. They can even think of a name for the new creature, which helps prevent them from associating the new “insect” with the common food items you are using as model insects.
- Encourage your students to simply observe the “insects” (i.e. beans and noodles). Do not collect them yet. First, they need to note where the insect is living and under what conditions. Tell them to write as many details as they notice about the surroundings of the insects. (NOTE: you might want to carefully place types of “food” that each “insect” might eat near the “insect.”)
- Bring the group back together and have them share where they found the insects and under what conditions. You may need to ask specific questions to get the students to focus on certain conditions rather than just a treasure hunt.
- Following this discussion, place a collection container with each group that contains one “insect.” Tell them it is their job as scientists to study this insect in detail and teach us about their insect.
- Physical Description of Insect:
- Any specific colors or patterns on insects' bodies?
- How does this insect move? Does it have legs?
- How many eyes does this insect have?
- What do you think that insect might eat?
- Do they live with other insects or alone?
- How do you think they defend themselves? What indications do you notice?
- Physical Description of Insect:
- Have students name their insect and create a drawing to catalog the insect including where it lives, and any unique characteristics they discovered.
- Hang the drawings and catalogues around the classroom and give students an opportunity to share their findings with the community. You may also choose to take pictures of your students’ work and share on Instagram and add them to the Instagram “Love Bugs Museum” project. If so, simply take a photo of each drawing and upload to Instagram using the hashtag #showusyourlovebugs
Sources
Authored by:
