Portraits and Dreams: Framing and Point of View in Self and Community Portraits Activities
Activities
DAY ONE: EXPLORING PHOTOGRAPHY
Today’s lesson engages students in a broader discussion about various purposes of photography and choices that photographers make.
Step 1: Activate Prior Knowledge.
Ask students what they know about photography; contributions may range from the use of photography in social activism, photography as art, photography as a means of communication, and popular photographic apps.
Questions to jumpstart the conversation include:
- Why do you think photography is such an enduring artform?
- What are some photographs that are important to you?
- How often do you take photographs? What of? Why?
Record student contributions and identify that this series of lessons is designed to deepen our language and understanding of photography.
Step 2: The Photographer’s Point of View.
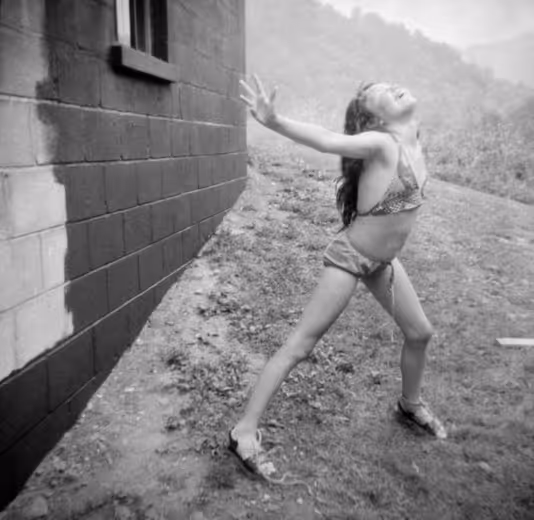
Remind students that ‘reading’ a photograph is subjective and that it is OK to have varying perspectives and interpretations. Prior to sharing Clips 1 and 2, let students know that they will be viewing photographs by Denise, an elementary school student.
Ask them to pay attention to (and take notes on how) Wendy and Denise describe photography and to choose one of Denise’s portraits that they might like to explore further. (Stop the clip at 00:39:32).
Tell students that as photographers, we have the capacity to alter the appearance of things by where we look at them from. Then ask them the following questions and provide time for them to respond:
- What choices does Denise make in her photographs?
- How do you respond to them?
- How have the clips added on to or shifted our understanding of photography?
- What surprises, questions, or ideas are bubbling up for you in terms of the power the person with the camera has to frame our relationship to an image?
Step 3: “Reading Photographs.”
Refer to handout “Reading Photographs”. Ask students to select one photograph for close reading. Ask students to respond in writing to the following questions related to personal interpretation: What is your first impression of this photograph? How do you feel when you look at it? What do you think is happening in this photograph? What do you wonder about when you look at this photograph? Then, students should respond to the following questions related to photographer’s decisions (e.g., point of view and framing). Consider the photography element point of view. Where is the camera? How does that change the picture? Consider the photography element framing. What’s included? What’s left out? Why do you think the photographer wanted to frame the photograph in this way? Facilitate a discussion about what different life factors might influence how we ‘read’ photographs. How might they, as photographers, distinguish between their eyes and the camera?
DAY TWO: FRAMING
“What is a portrait? Unlike a snapshot or a conventional physical description, a portrait tells us something essential about the subject.” (I Wanna Take Me A Picture, p. 37). Framing has to do with the unique ways each of us sees the world. In today’s lesson, students will consider what they might include or leave out (frame) in self and family portraits. Some important tools that we have for making a portrait are facial expression, body gesture, background, objects, light.
Step 1: A Closer Look at Portrait and Framing.
Refer back to the handout “Reading Photographs”. How does the photographer’s choices in point of view and framing influence your response? Consider the captions in relation to the framing and point of view. For example, in the still life with a picture of me, who is me? Students can either share and listen to one another's perspectives or draft a comparison paragraph.
Step 2: Journaling.
Read the following quote from young photographer, Robert Dean Smith, aloud to the class:
I favor my Dad, but I act just like myself. I’m sort of tall and fat. I’m almost as tall as my dad is but I’m taller than mom. I lose my temper a lot whenever anybody makes me mad I’m ready to fight...When I get older I’d like to live in the same holler. I know that. It’s just a peaceful place. I’ll build a cabin and live in it. I’ll probably follow after my dad. I’ll work in the coal mines and just live right here.
Ask the students to journal about the images that they see when they hear Robert Dean Smith’s words. Then, ask students to journal about how they would make Robert Dean Smith’s portrait. What would they include? Leave out? Where would the camera be? How might a portrait that you make of Robert Dean Smith differ from his self-portrait? Students should share their ideas with partners.
Step 4: Planning for your own self-portrait.
Using Robert Dean Smith’s words as an exemplar, write your own self-portrait. If done in partners, ask your partner what images they saw as they read your portrait. Ask students to make a list of photographs that they would take to describe themselves or their family. Keep in mind the elements of photography (e.g., framing and point of view) What do they hope to include in the portrait and to leave out? How do they plan to use the camera?
Outside of class time, students should begin taking portraits of themselves and their families.
Day Three : COMMUNITY (Clips 5 & 6)
Today’s lesson asks students to consider the meaning and significance of community. Community is a common word, but nonetheless an abstract one--and helping students think about their membership in multiple communities, what it means to belong, to be a part of, and to recognize community will be an important step in this lesson. Students will explore how portraits can be created to convey details about their own communities.
Step 1.
Ask students to begin by defining community in their journals and making a list of communities they belong to. Are there any important differences between how you see your community and others see you/it? What do you know about your community that outsiders might not? Are there any harmful or negative stereotypes that you would like to speak back to about your community? How have you seen your community represented in the media, in school curriculums, in politics?
Step 2.
While watching clips 5&6, ask students to pay attention to the ways that Delbert and Gary describe their communities and their relationship to it over time. Ask students to journal about either Delbert or Gary’s photographs and their commentary about community. What role does the natural world play in their sense of community? What can we learn from their experiences? What would you want to include or leave out if making portraits in their community?
Step 3. Journal.
Outside of class time, students may begin to make community portraits for one community they belong to. For example, using the alphabet as a guide, make a list of photographs you could take to convey a community (e.g., A for ….; B for….). What would you want to include and leave out? What choices would you make with the camera? Why?
DAY FOUR: CHALLENGING MONOLITHIC REPRESENTATIONS OF OTHERS (Clips 3 & 4)
Today’s lesson asks students to consider differences and tensions between insider and outsider portrayals of community, with a specific focus on how Appalachian communities have been framed in media. What are some perspectives on rural poverty? Where do those perspectives come from?
Step 1.
Using either a projector or setting up a walking gallery, share the 1964 photo essay, “The War on Poverty” from Life Magazine which was taken in the same geographic area, just 10 years prior to the work featured in Portraits and Dreams.
Ask students to think about word choice in the photographic captions and point of view and framing. Pay specific attention to portraits 3, 8, and 25. Students can take notes on photographic and word choices that stand out. What do these choices convey about the photographer’s point of view and framing of these portraits? How is community portrayed here?
- Caption for Portrait 3: “Nadine McFall, 1, happily reached over to pat the stomach of a huge doll—its wardrobe long since lost and never replaced —as she squatted on a crowded couch in her great grandmother’s shack near Neon.”
- Caption for Portrait 8. “On a wintry afternoon in Line Fork Creek a family trudged across a rickety suspension bridge over a sewage-polluted stream to its two-room shack.”
- Caption for Portrait 35. “The commonest sights around Appalachia were aging men and ragged urchins.”
Step 2. Reading Photographs.
Sue and Johnny are from the same rural community, and have had different experiences and perspectives about poverty throughout their lives. Ask students to journal about what they discover about Sue and Johnny as they watch the clips. What role did photography play in their childhoods? How does their point of view shift throughout their adulthoods?
Pause the film at 24:00:02 so that students can ‘read’ Sue’s portrait of playing on top of the coal bin behind her childhood home. Ask students to describe what they see. How does the accompanying text add to your interpretation of the photograph? What’s different about Sue’s photographs and those included in the “War on Poverty”? What does this make you think about the significance of framing and point of view?
Step 3. Sharing Community Portraits.
Describe the choices you made in taking community portraits. What challenges did you run into? What surprised you? Is there a portrait that you feel particularly compelled by? In partners or small groups, share something from your ABC community portrait work.
Sources
Authored by: